Hi there… happy Thursday! As we get the ball rolling here on the new site please be patient with us as we are working out the bugs and making ourselves at home here! One of the things I am most excited about is our education and creative team that we have put together. We have some very inspiring, creative ladies from our community willing to share their insight and skills with you and I am so excited for what they have in the works! We will have a big welcoming very soon but we just couldn’t wait to start sharing so PLEASE welcome Heather today with some great tips on using my favorite big brush markers!! xox – Shanna
Hey guys, I’m so excited to be here for my first of many blog posts for Illustrated Faith! Isn’t the new site AMAZING? I can’t wait for all the pieces to continue to fall into place and see what God has in store for 2015 in this place!!!
Those that don’t know me, I’m Heather Greenwood and I LOVE to art worship in my Bible and share my art and faith on my blog, heathergreenwooddesigns.com and Instagram! I can’t wait to share with you some techniques and tutorials and just have fun showing you some of the things I do during my art worship time.
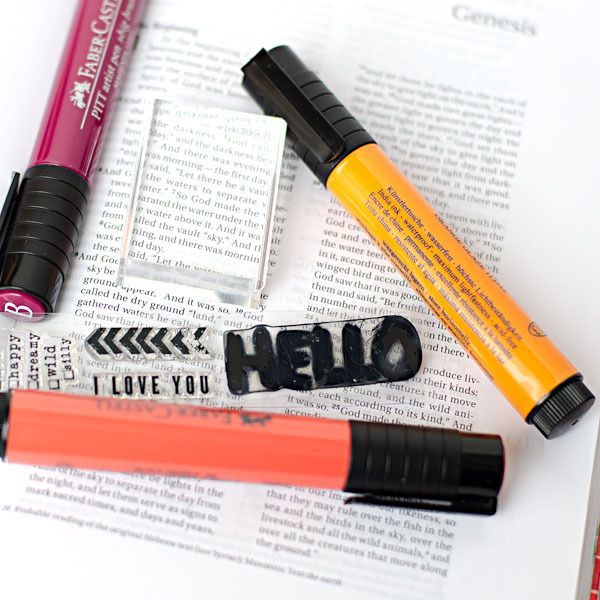
Yesterday Shanna shared all about the different inks you can use and one of my favorites are the Faber-Castell Big Brush Markers. I know they aren’t your traditional stamp pad, but that’s what I love so much about them! I also love that they stay wet a little longer than dye inks so you can play with them a little more before actually stamping down your image.
So, today I want to share with you one of my favorite techniques using them. That technique is to stamp one image with multiple colors. Having the ink in marker format rather than a pad makes this so easy and you can have lots of fun with them!
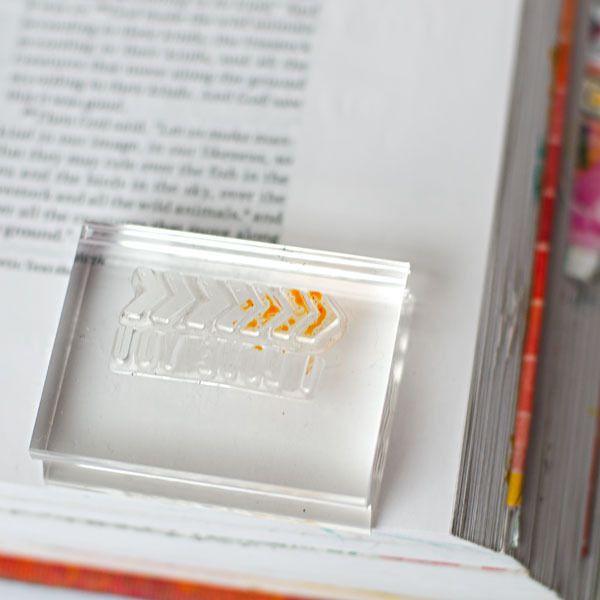
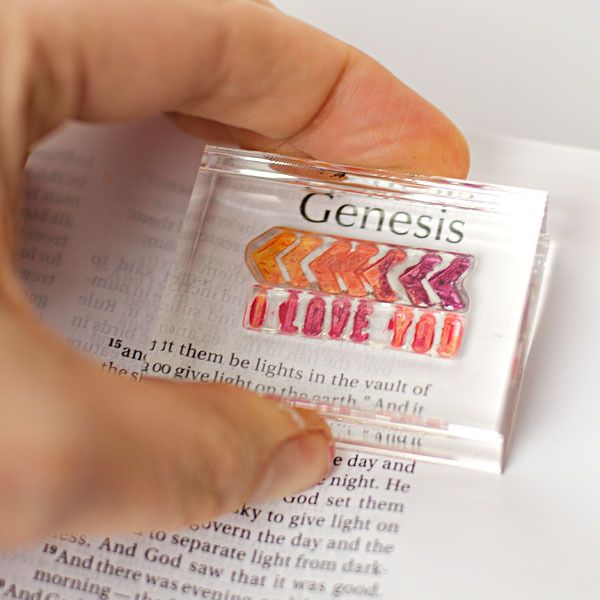
STEP ONE: Choose your stamp and marker colors you want to use.
STEP TWO: Using your marker start drawing over the stamp, switching colors as you wish and even going over some of the previous color(s) to blend the colors together. If it’s a larger image and you’ve used a lot of time coloring it, you might want to “huff” on it with your breathe to reactivate the ink before the next step. Since it’s permanent once dry, you want to try to work at a decent pace before it starts drying. The beauty of the India ink is that it does take longer to dry, so you have plenty of time to play and really blend the colors together.
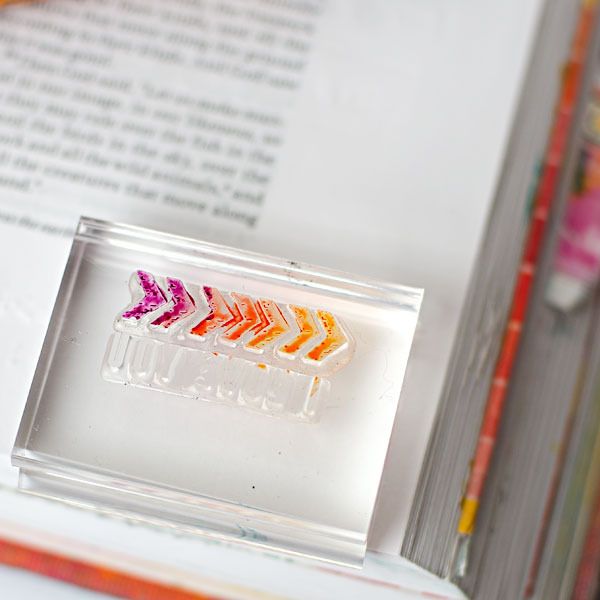
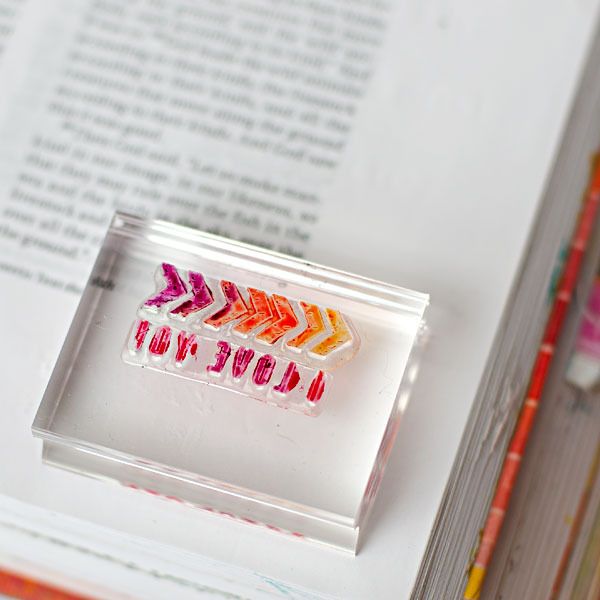
STEP THREE: Press your image down and see how cool that multi-colored image is!

TIP: Start with the lighter color first, and add the darker color last. This prevents getting dark ink on your light ink’s marker tip. However, if you get dark ink on your lighter ink, you can easily remove it. You just draw on a piece of paper until the dark ink is gone. I like to pull out my art journal and find a blank page to do this on.
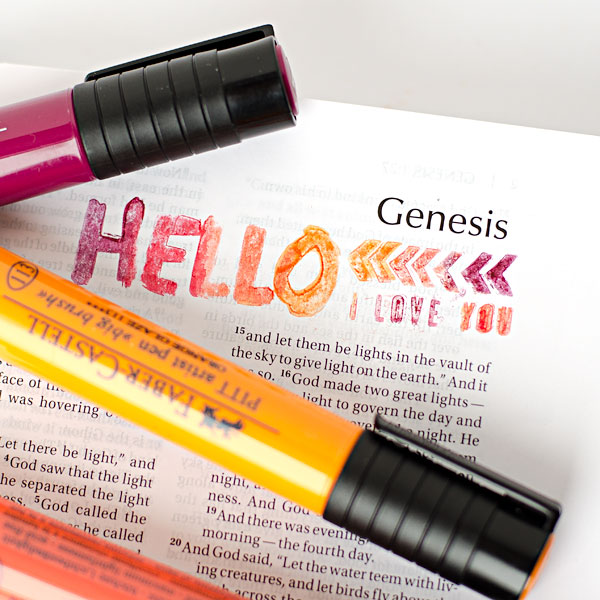
Voila! Three easy steps and you have a really fun image! Here are some samples of doing it in my Bible!
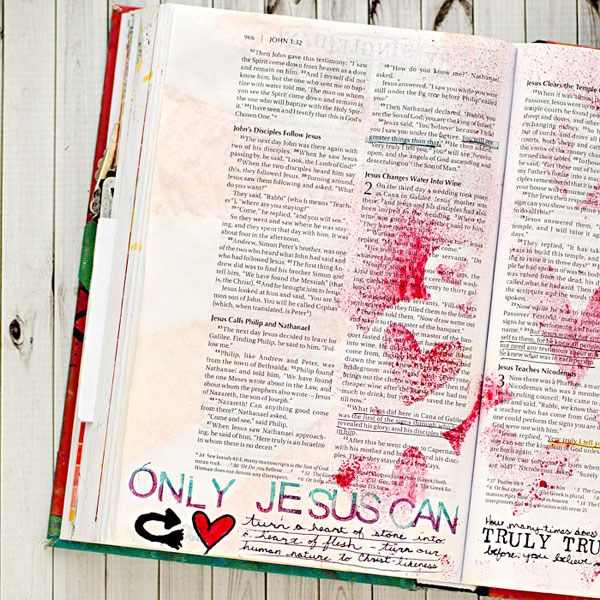
John 2 – I wanted to illustrate the story of Jesus’ first miracle, turning water into wine. I colored the top of the letter with a blue marker and the bottom of the letter with purple. One of the letters I did purple then blue, oops LOL! I don’t let mistakes bother me. The point is that I had fun illustrating the miracle story in a memorable way.
John 5 – I’ve been really loving the purple, red, orange color combo lately. Here is an example of where I had to clean off some of my marker tips. I was having too much fun coloring I forgot to start with the lighter color each time. Plus, the “E” was repeated 2 times so it was pretty messy by the last time with leftover ink still on it. I don’t know how well you can see, but I also used the same color blending technique on the little arrows stamp.
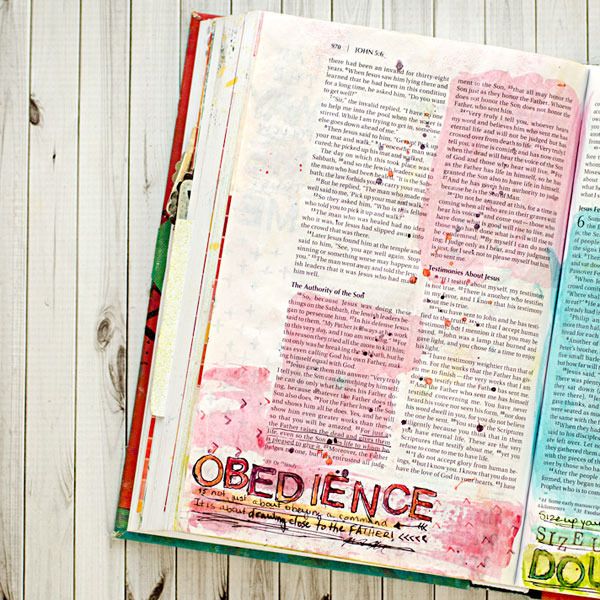
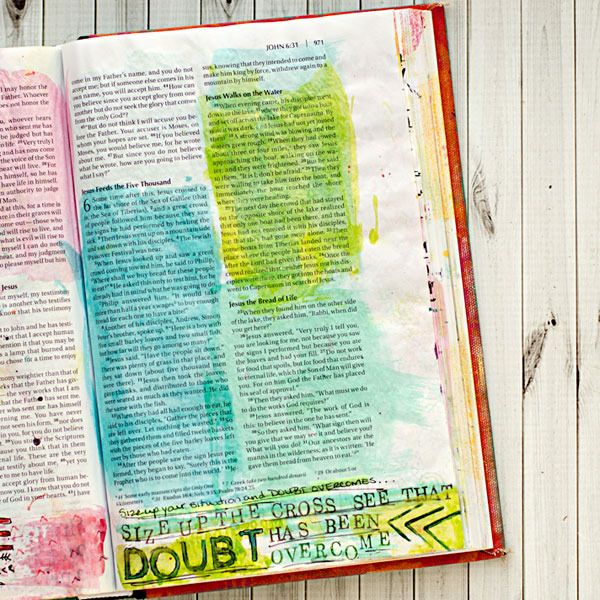
John 6 – I don’t know if you can tell on this one, but I used greens and blues in the lettering. I also did the color blending on the arrow stamp.
Not only is stamping with the markers fun and easy to do, they are easy to clean up too. I just take a baby wipe and wipe off the leftover ink. Another difference between the markers and other markers is that they don’t bleed and they are permanent once dry. No bleed through and no worry of reactivating the color… Isn’t that awesome?!?!?! I love that there are so many color options too. Do you have a favorite marker or ink that you like to blend and stamp with? I’d love to hear about it!
I also want to say a big thanks to Shanna for asking me to be a part of the education and creative team! I’m beyond thrilled and excited to share my journey of Illustrated Faith with you! I pray that you have a wonderful time of art worship and I can’t wait to see it!!! XO
Heather Greenwood
heathergreenwooddesigns.com
instagram.com/heathergw


